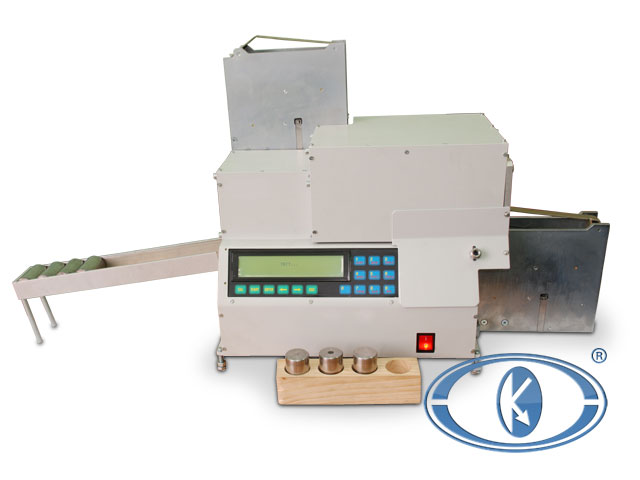
«Inspector» VD-131ND Purpose
VD-131 ND special-purpose eddy current flaw detector is intended for detection of surface defects in steel cylindrical rollers with diameter of ø32 mm and length of 52 mm included into the roller-bearing used in axlebox units of freight cars and coaches, and also for testing of other rotary bodies, such as: ball and piston pins, sleeves, cylinders, piston rods, sleeve cases etc. (at additional modernization of flaw detector scanning system by the Customer's request).
Flaw detector can be applied for performing non-destructive testing of cylindrical rollers in the manufacturing plant territory, at the car production facility and car-repair plants.
By functionality flaw detector is rated as special-purpose eddy current flaw detector, by embodiment – as stationary, by the level of operator's participation in the testing process – as automatic.
ADVANTAGES AND DISTINCTIVE FEATURES OF FLAW DETECTOR
- testing of roller end surfaces;
- detection of defects with crack edges opening from 2 μm;
- demagnetization device availability;
- testing efficiency - at least 120 rollers per hour (in automatic mode);
- automatic sorting of accepted and rejected rollers by receiving cartridges;
- connection with PC;
- small mass and dimensions parameters.
TECHNICAL SPECIFICATION AND SERVICE FUNCTINOS OF THE INSTRUMENT
- VD-131 ND flaw detector consists of electronic unit (as a part of electromechanical unit, mains power supply unit and electronic units), eddy current probes – one axial and two edge ones, send-receive cartridges for rollers (15 pieces), cartridge-isolator for rejected rollers;

Electromechanical unit construction
- Min. dimensions of detected defects::
- depth − 0,05 mm and more;
- opening − from 0,002 mm.
- number of eddy current ensounding channels − 3;
- frequency of flaw detector eddy currents excitation − 130 kHz;
- on the testing site, the roller rotates, and its surface is divided in two testing areas:
- edge area – testing is carried out by two fixed probes;
- axial area – testing of a generating line is performed by one probe which is moving along the roller axis, thus, forming a spiral scan.
- owing to unique construction of receiving multidifferential eddy current probes, the cracks of any direction, voids, electric burns and other defects are easily detected;
- spring loading mechanism enables to achieve invariant gap between axial probe and roller on the testing site.

Axial eddy current probe appearance
- demagnitization device makes it possible to remove remanent magnetization of the testing roller, prove the probability of small metal particles adhering on the roller surface and their further ingress in the bearing;

Demagnetization device
- during digital signal processing the analysis of both high-frequency and low-frequency signal components is carried out what, in its turn, allows not only to detect surface defects, but also to watch irreversible changes in the metal structure;
- storing of tested rollers information in the flaw detector memory – 250 records;
- flaw detector provides the following functional capabilities: display of service information on the quantity of accepted and rejected rollers, accept-reject level in per cent, set and bearing numbers, amount of tested sets;
- built-in clock and calendar;
- time of flaw detector operating mode setup – up to 7 min.

The rollers rejected by VD-131 ND flaw detector and confirmed by magnetic particle and penetrant inspections
- testing efficiency – at least 120 rollers per hour (it is possible to increase the efficiency on the Customer's request);
- time of continuous flaw detector operation – at least 8 h;
- overall dimensions of flaw detector (assembled) − up to 1100 mm х 400 mm х 600 mm;
- flaw detector weight – up to 35 kg;
- flaw detector is powered from AC mains with voltage of (220) V and frequency of (50) Hz;
- generation of electronic testing reports and their transmission to PC;
- automatic sorting of accepted and rejected rollers by separate isolators.
| Main specifications | |
| Number of eddy current channels | 3 pcs. |
| Min. dimensions of detected defects | depth − 0,05 mm and more; opening − from 0,002 mm |
| Testing efficiency | at least 120 rollers per hour |
| Overall dimensions of flaw detector | up to 1100 mm х 400 mm х 600 mm |
| Keyboard | Russian, English |
| Flaw detector weight | up to 35 kg |
| Time of continuous operation | at least 8 hours |
| Power supply | AC mains with voltage of (220) V and frequency of (50) Hz; |
| Time of flaw detector operating mode setup | up to 7 min. |
| Warranty | 12 months |
| Main metrological performance | |
| Protection level in operation | IP 40 |
| Ambient temperature | from 0 to +35 ºС |
| Atmospheric pressure | from 84 to 106,7 kPa |
| Relative humidity | 80 % at the temperature of 20 ºС |
| Flaw detector in shipping package is resistant to the influence of |
|
| Full average flaw detector lifetime | at least 10 years |


